

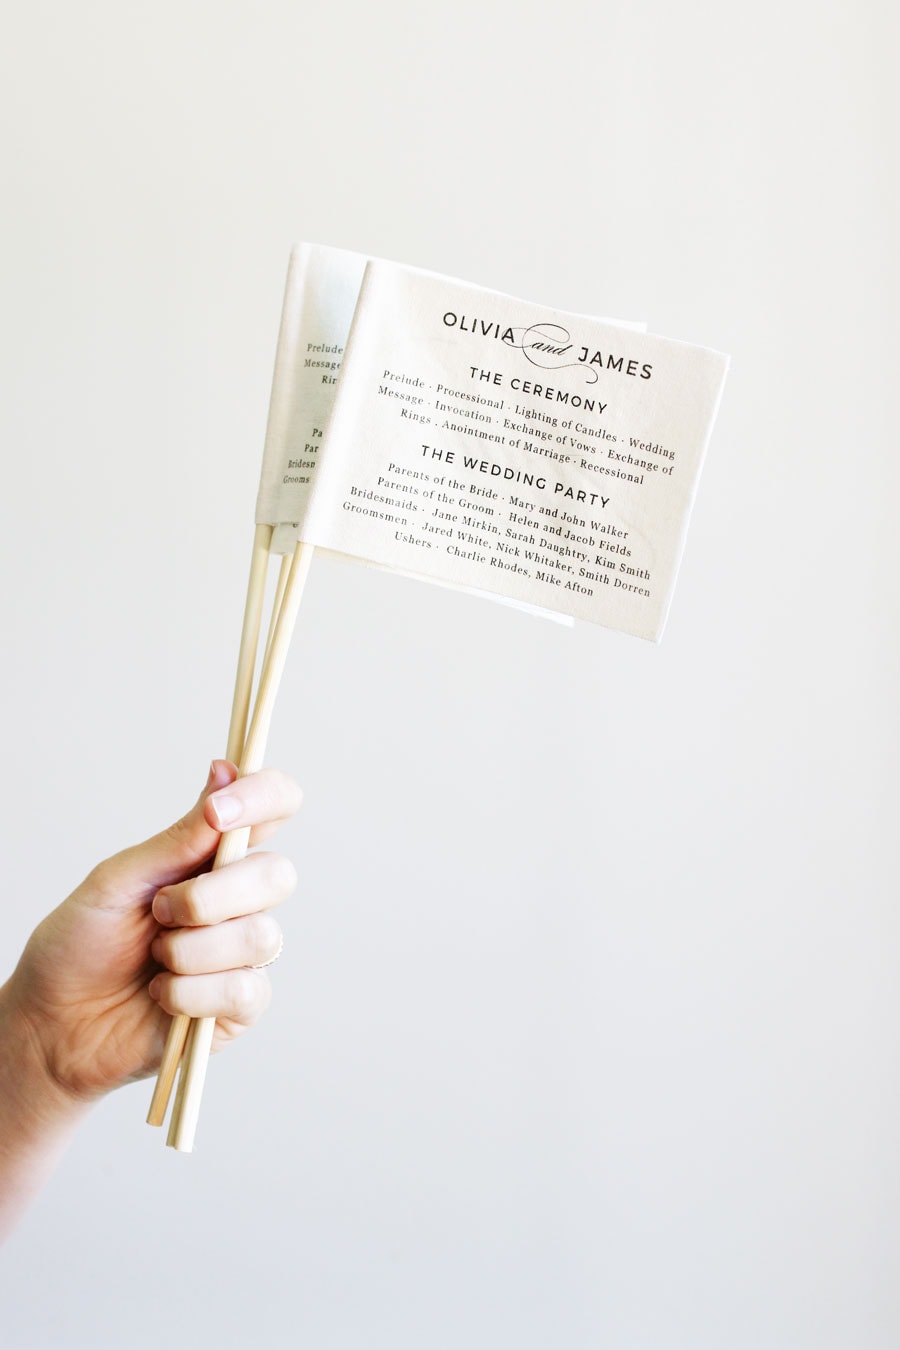
Fun and Festive Program Flags
Here’s a fun DIY to get you in that Friday spirit (not that you needed my help or anything). The idea for these came from a friend of mine who got married a couple years ago. She and her hubby had a rather nontraditional wedding, and when it came time for them to walk down the aisle as husband and wife, all the guests waved flags, banged on little drums and blew kazoos. It was pure magic and so. much. fun. And with that, these fabric program flags were born! In this tutorial I’ll show you how to make your own program flags using our (free!) wedding program template.

How to Make Your Own Program Flags (+ a Free Template!)
I came up with the idea for these a long time ago, but like most of my projects, I stewed over how to make them. At a minimum I knew I wanted them to be easy and definitely not require any sewing. But the only way I could think to transfer writing to fabric was with iron-on tee shirt paper. Easy, yes, but not quite the look I was going for.
If you’ve ever used iron-on tee shirt paper before, you’ll know it comes out rather stiff and plastic-y as apposed to soft and wave-y. Plus it has a noticeably plastic sheen to it. So back the drawing board I went.
A few weeks went by then out of nowhere the idea came to me–why not just print the programs directly on fabric?
Yessss! I hate to say it, but you can now expect at least 20 more fabric printing projects from me in the months come.

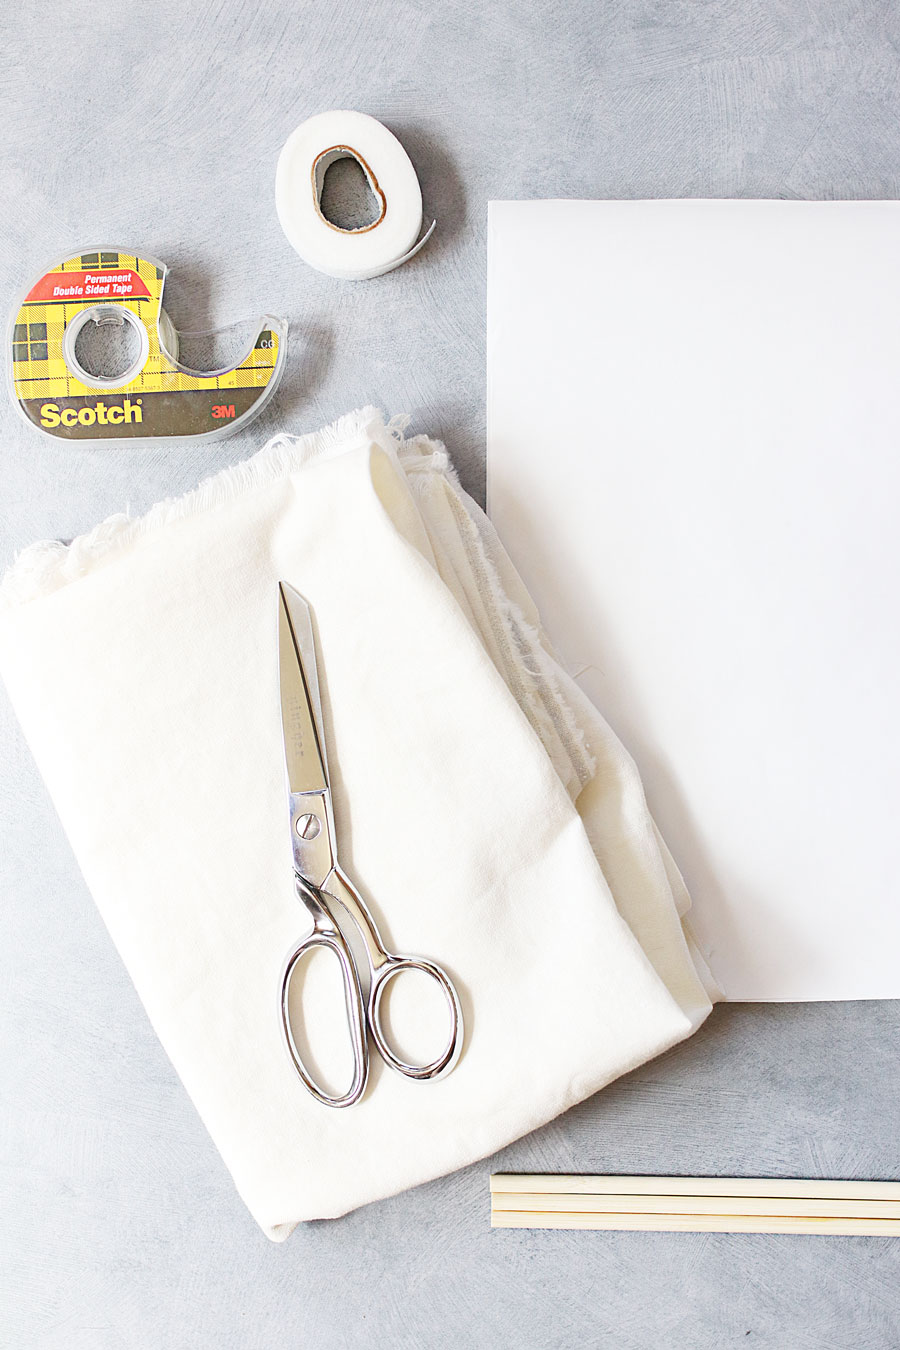
Materials
Free Program Flag Template (for use in MS Word)
Freezer paper
100% cotton fabric
Double sided tape
Wooden dowels approx. 12″ long and 1/4″ thick
Fusible fabric tape
Scissors
Iron
Instructions
Gather your supplies and if you need to, trim things down. You’ll want your freezer paper to be 8 1/2″ x 11″ (I just traced a standard piece of printer paper and trimmed it) and your dowels no more than 12″ long.
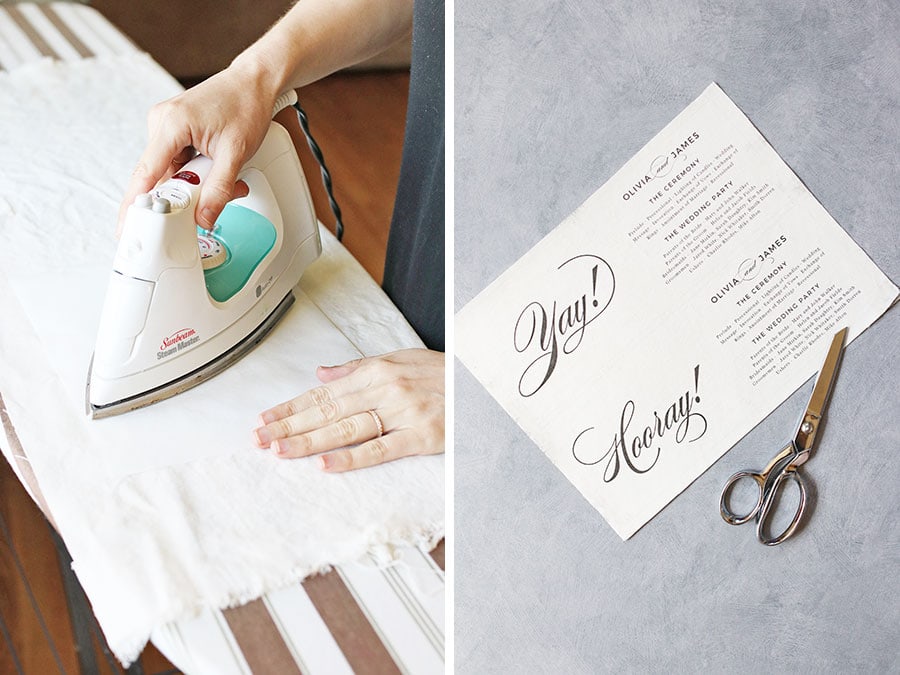
1. Set your iron to the “cotton” setting and disable the steam if possible.
2. First you’ll want to iron just your fabric to remove any wrinkles and prevent bubbles. Once it’s as wrinkle-free as possible, place your 8 1/2 x 11″ piece of freezer paper with the wax side face-down on top of your fabric.
Run the iron over the freezer paper a few times to bond it to the fabric, being sure to spend extra time on the edges and corners. Let cool.
3. Once the freezer paper and fabric have cooled completely, trim the fabric down to 8 1/2″ x 11″ so the edges perfectly align with the edges of the freezer paper.
4. With the freezer paper still attached, place the fabric in your printer’s rear-feed tray with the fabric side facing up. If your printer doesn’t have a rear feed tray, experiment with your printer’s bottom tray to see whether the fabric needs to be face up or down (most likely, it’ll need to face down), and insert it accordingly (just note that fabric may jam some printers when using the bottom paper tray).
Print like you would a normal piece of paper.

5. Cut our your flags and peel the freezer paper off the back.
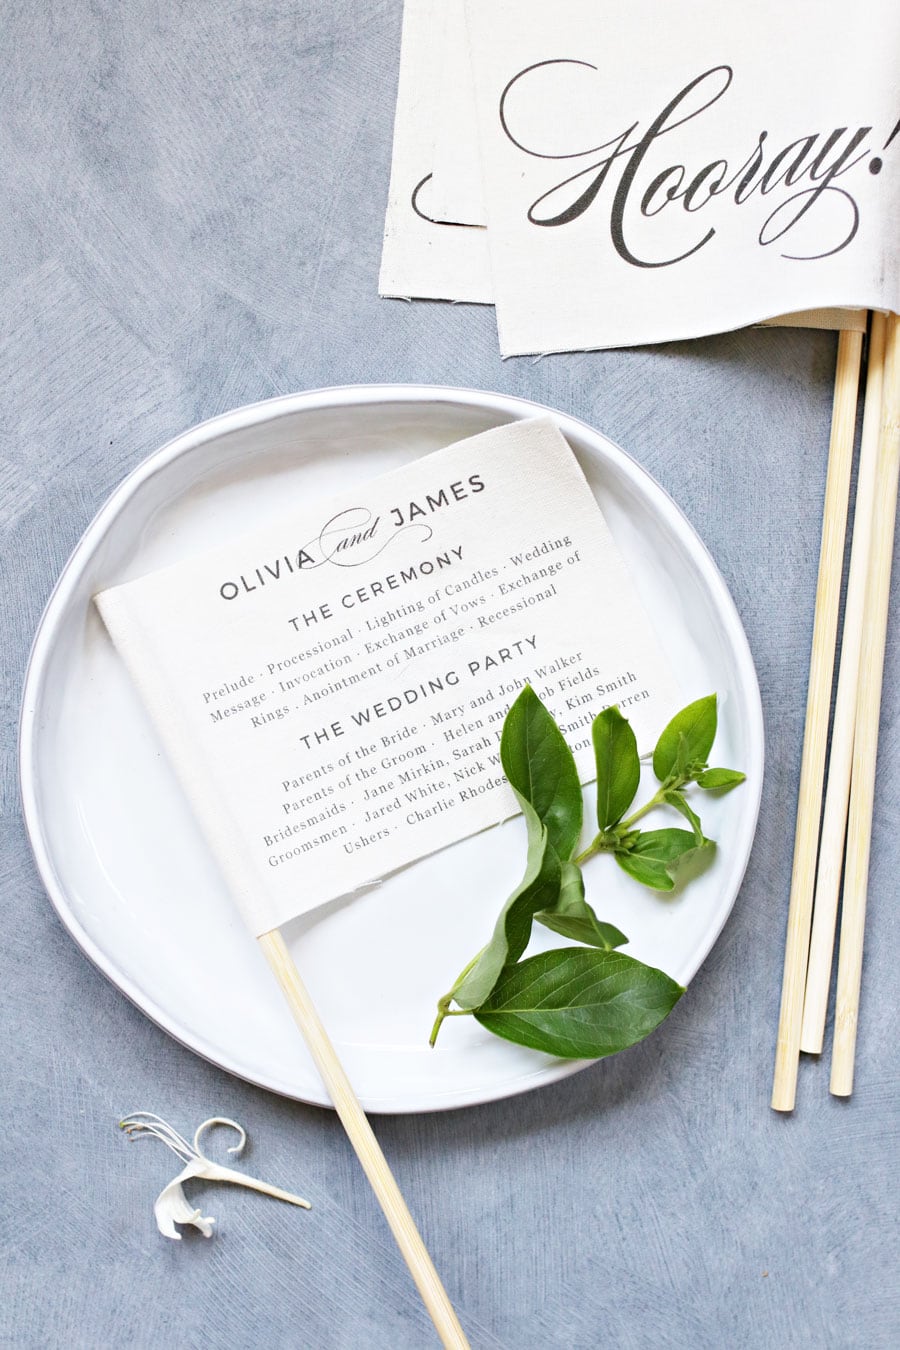
6. Place a piece of double sided tape along the center of the fabric flag where it will attach to the dowel.

7. Place a dowel on top of the tape and fold the fabric in half around it. Press.
8. Open the fabric again and loosely measure the length of fusible fabric tape you’ll need to cover each of the three edges. Cut the fusible tape and lay a piece along all three sides.
9. Close the flag with the fusible tape sandwiched in between the two sides. Iron shut.
Okay, now let’s get a few of your questions out of the way.
What kind of fabric should I use?
Anything 100% cotton will hold ink nicely. I used a cotton duck because I had some on hand but linen or muslin will work too.
What printer did you use?
Just a standard desktop inkjet printer. This might work on a laser printer but I haven’t tested it myself.
Do I have to worry about the ink smearing?
It all depends on your printer. When I printed mine, a little ink got tracked on the very outer edge of the fabric but I just trimmed it off when I was cutting out my flags.
This is one of those DIYs that will work better with some printers than others. The only way to know is to test it.
Can I print these on paper?
Yes and they should turn out beautifully! Follow the same instructions above but skip the ironing and just tape everything together with double-sided tape.
The information contained on this Website and the resources available for download through this website are for educational and informational purposes only. I am only sharing what worked for me, and as such, I cannot guarantee that any products or processes will give you the same results.


Leave a Reply
We don't like getting spam either. Your email is safe with us.