• Home
  • About
  • Blog
  • Contact
  • Business Resources
  • Shop
Pipkin Paper CompanyPipkin Paper Company
  • Home
  • About
  • Blog
  • Contact
  • Business Resources
  • Shop

How to Make an Envelope Template (or Snag Ours for Free)

August 4, 2021 Posted by Stephanie Invitations, Weddings

Ps. To snag our free A7 envelope template for use in Microsoft Word, just click here. To download the calligraphy font we used (you’ll need this to make your envelopes look exactly like ours), scroll down to the bottom of this post and follow the links.

Pps. Wondering where to buy envelopes? We love Cards and Pockets.

I hate to say it, especially since I’ve been known to dabble in calligraphy a time or two, but hiring a professional calligrapher to address your wedding invitations is such a waste of money. At $3+ an envelope, why not put your credit card away and make an envelope template (or snag our A7 envelope template for free!) that you can print at home. Run off as many copies as you need, then re-purpose that baby to work for thank you notes, holiday cards, you name it.

Why hire a professional calligrapher when you can make your own printable envelope template and address your wedding invitations at home for free

Just follow this tutorial and you’ll never have to address another envelope by hand for as long as you both shall live.

How to Make an Envelope Template in Word

If done correctly, printing your own envelopes should be exactly like printing a piece of paper.

While most word processing software gives you an “envelope” option, I’ve found that it’s usually bulky and basic looking. Although it’s fine for business printing, it’s definitely not what you want for wedding envelopes or fancy stationery.

For that, we need to get a little creative.

1. Measure your envelopes

Hopefully you’ve figured this out already, but you need to know exactly how big your envelopes are (in inches or centimeters) with the flap closed. If you can’t find that info on the packaging, just break out a ruler and measure.

For our invitations, we recommend A7 envelopes which are 5.25″x7.25” but this could vary depending on the size of your invites. If you don’t know what size envelopes you need, this handy chart can help you choose the right ones.

2. Create a Word document

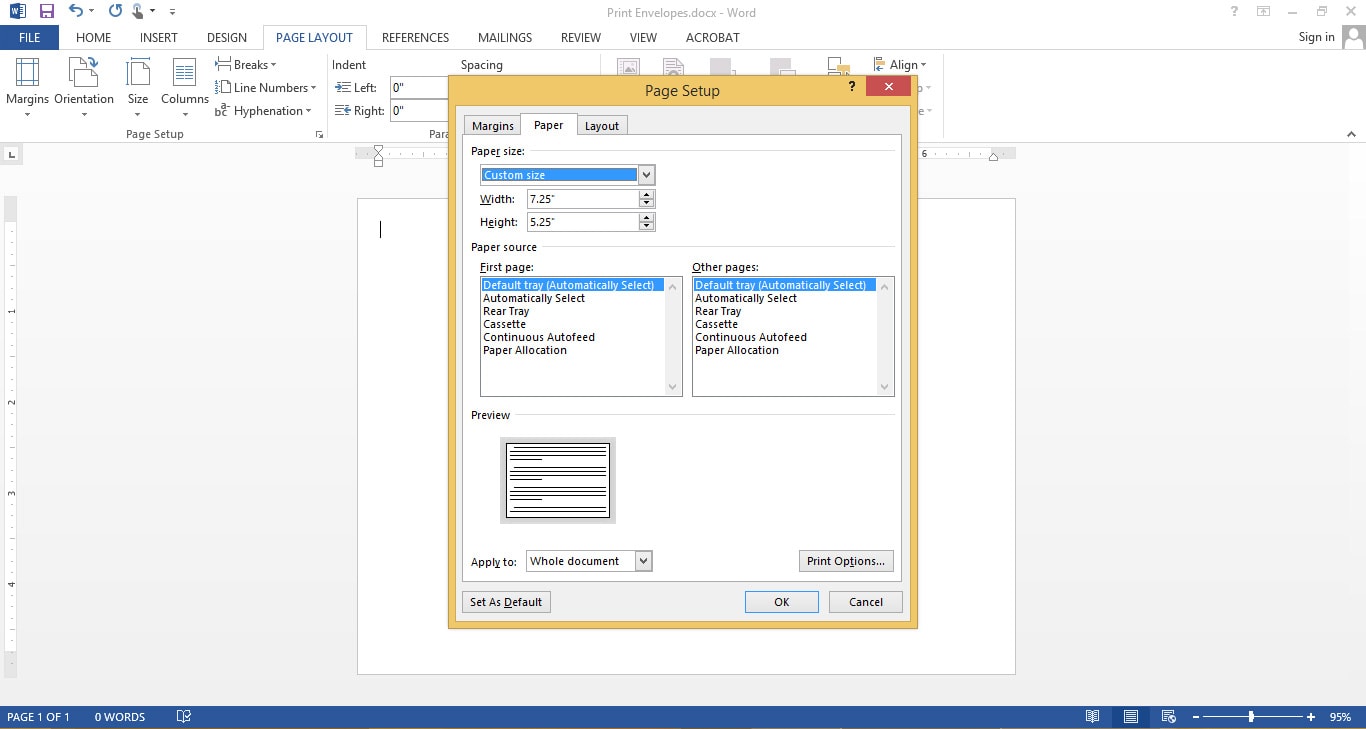
Create a Word document that’s the exact same size as your envelopes:

Go to Page Layout > Size > More Paper Sizes. Enter the size of your envelope in the Width and Height fields and click OK.

3. Add text boxes to your template

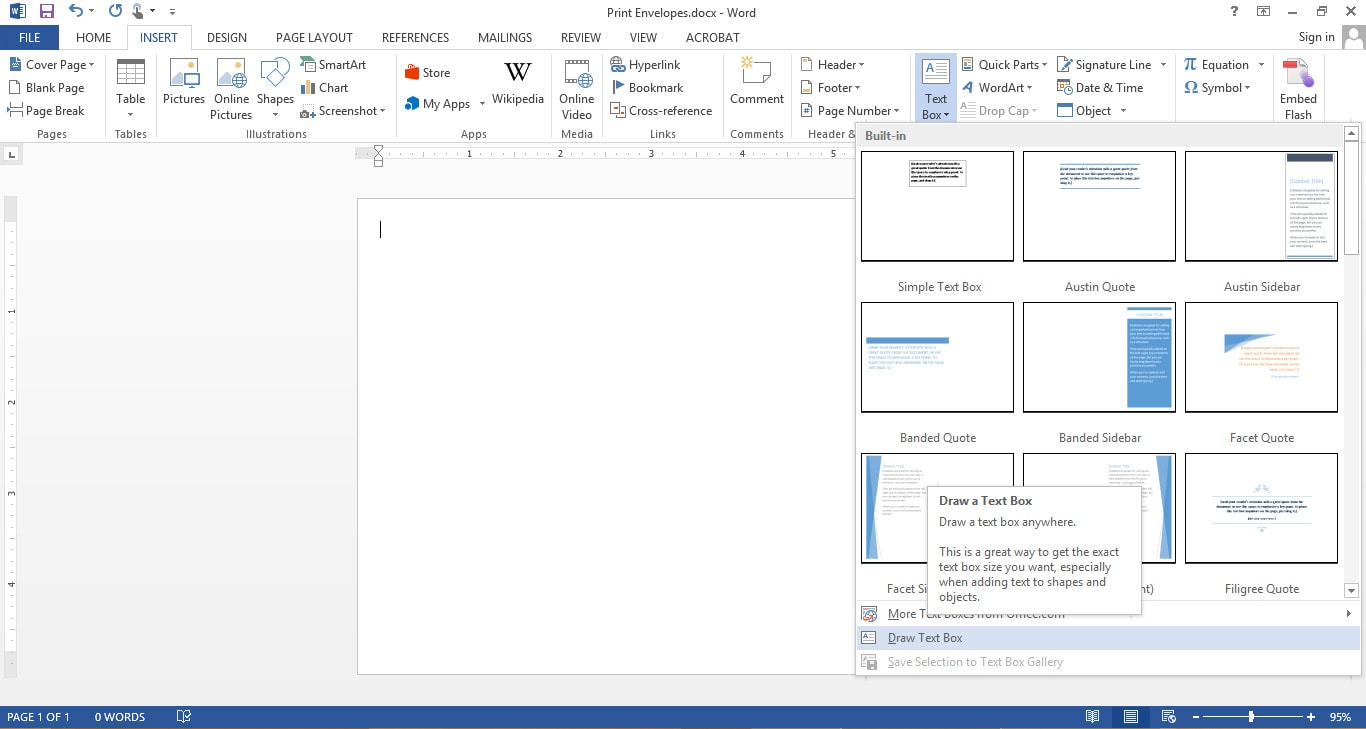
Go to Insert > Text Box > Draw Text Box. Draw a text box in the center of your document, making sure to leave plenty of room in for postage stamps and a return address at the top.

To remove the black outline around the text box, click on the text box and go to Format > Shape Outline > No Outline.

Once you’ve added your first text box, just click on the outer edge so there’s a solid black line around it, then hit Ctrl + C and Ctrl + V to duplicate it. I prefer to create one text box for each style of text (ie. calligraphy names get a box, while serif addresses get a separate box).

Make as many text boxes as you need.

4. Design your envelope template

One of the reasons we don’t use the “envelope” functionality already in Word is because this way allows us to use custom fonts, graphics and layouts.

Why hire a professional calligrapher when you can make your own printable envelope template and address your wedding invitations at home for free

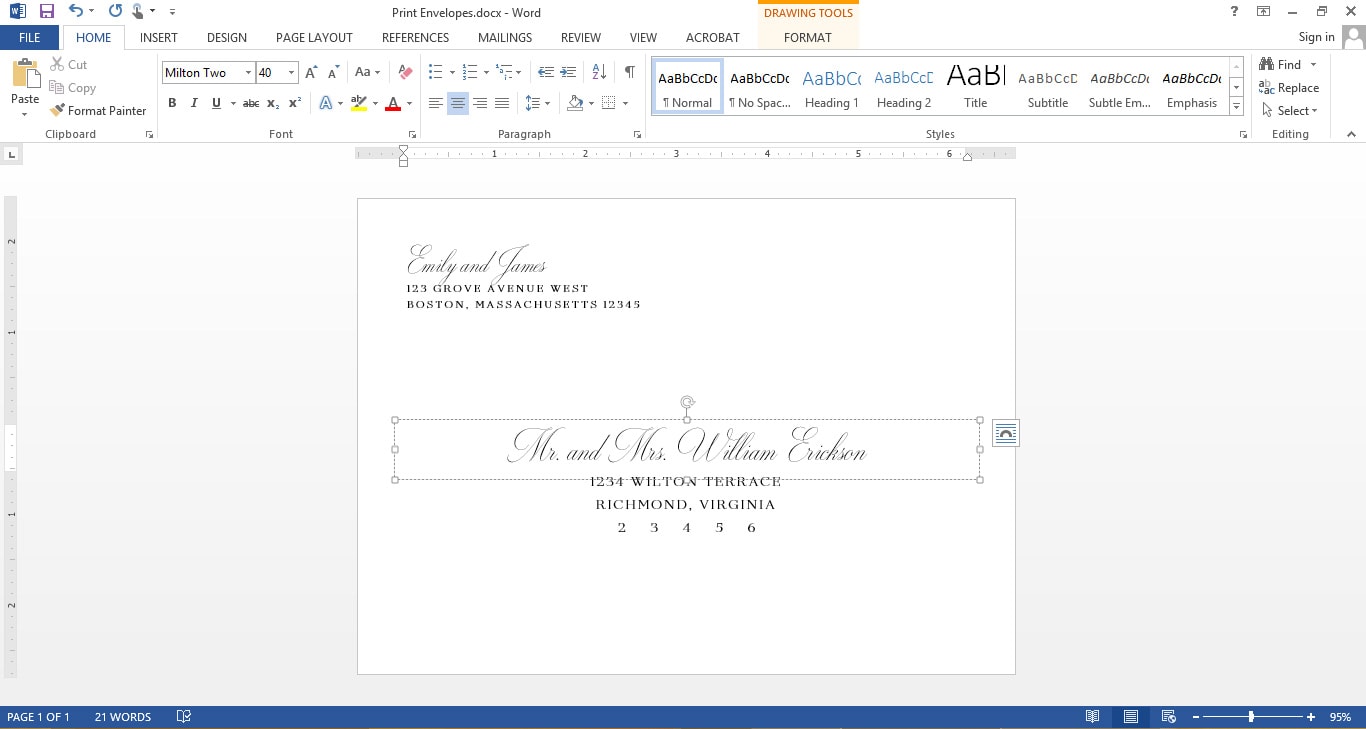
I think envelopes look best with a combination of calligraphy, sans serif and serif fonts. But that’s up to you. Ideally, you might want to choose 1-2 fonts that match your wedding invitations so everything looks uniform.

Here are a few of our favorite calligraphy fonts:

    • Caleigh Script
    • Melika Letter
    • Parisienne
    • Notera

–
Or you can head to dafont or Font Squirrel to look at other free options.

A note on return addresses: In this example I put the return address on the front of the envelope for simplicity’s sake. If you’d prefer to put it on the back, follow the same steps to create a second template in a brand new document. When it’s time to print, you’ll print the front side of your envelopes first, then flip them over and print the back side.

5. Duplicate the page

Once you have your template looking exactly how you like it, you’ll want to duplicate the pages so you can print several at once.

To copy your page, click in the gray margin outside the page. This will highlight your text boxes.
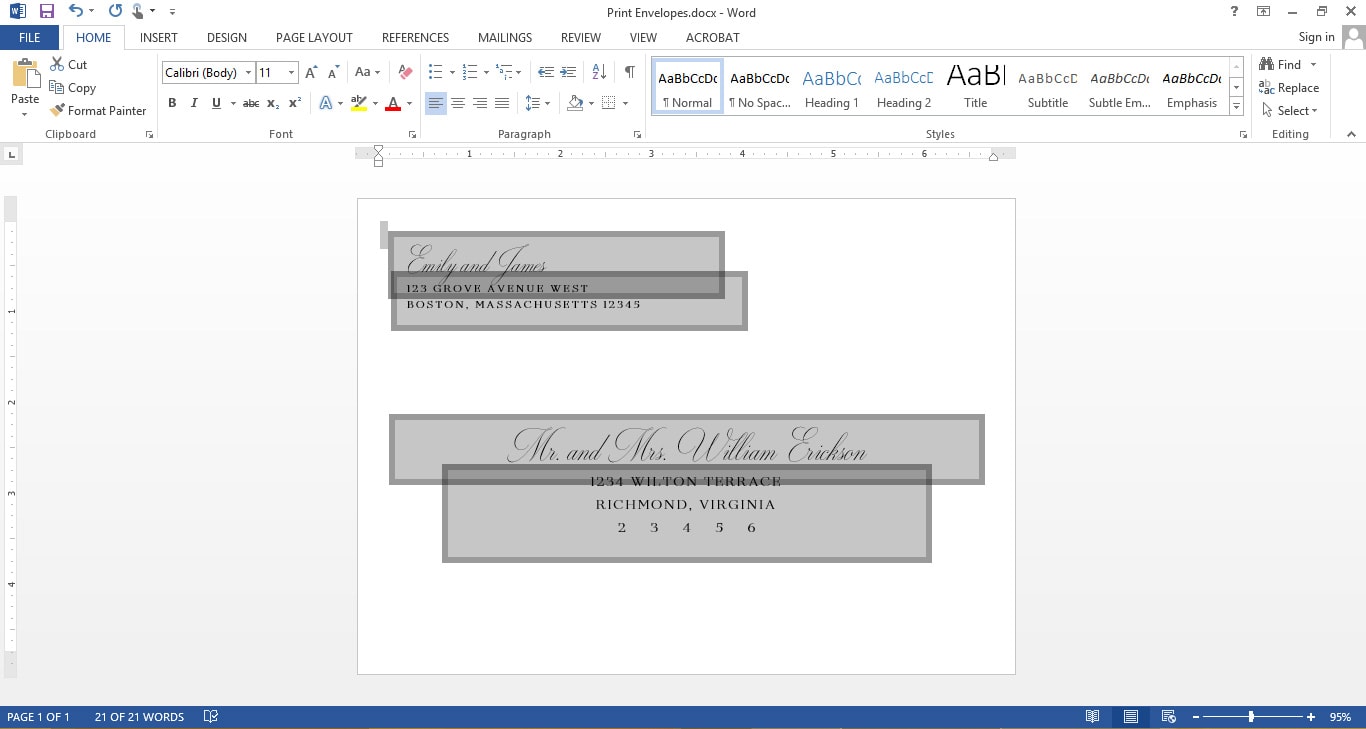
Hit Ctrl + C.

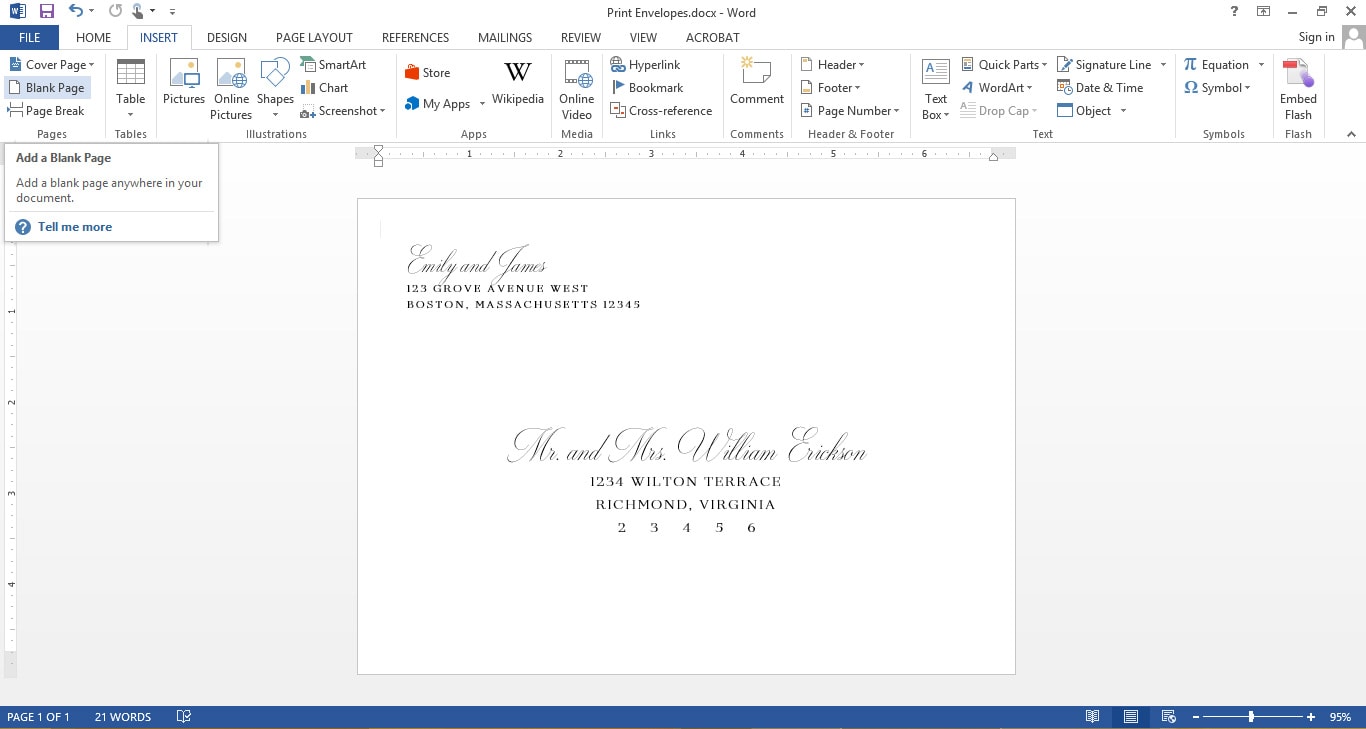
Then click anywhere on the white page that’s not inside a text box. You should see a blinking cursor in the upper left hand corner of the page. Hit End on your keyboard (this will add the blank pages after the existing page).

Go to Insert > Blank Page. Click approximately 15-20 times to add more pages. (I recommend creating no more than 25 pages per document. If you make too many, it’ll bog down your Word doc and you’ll have trouble with it freezing and crashing.)

Why hire a professional calligrapher when you can make your own printable envelope template and address your wedding invitations at home for free

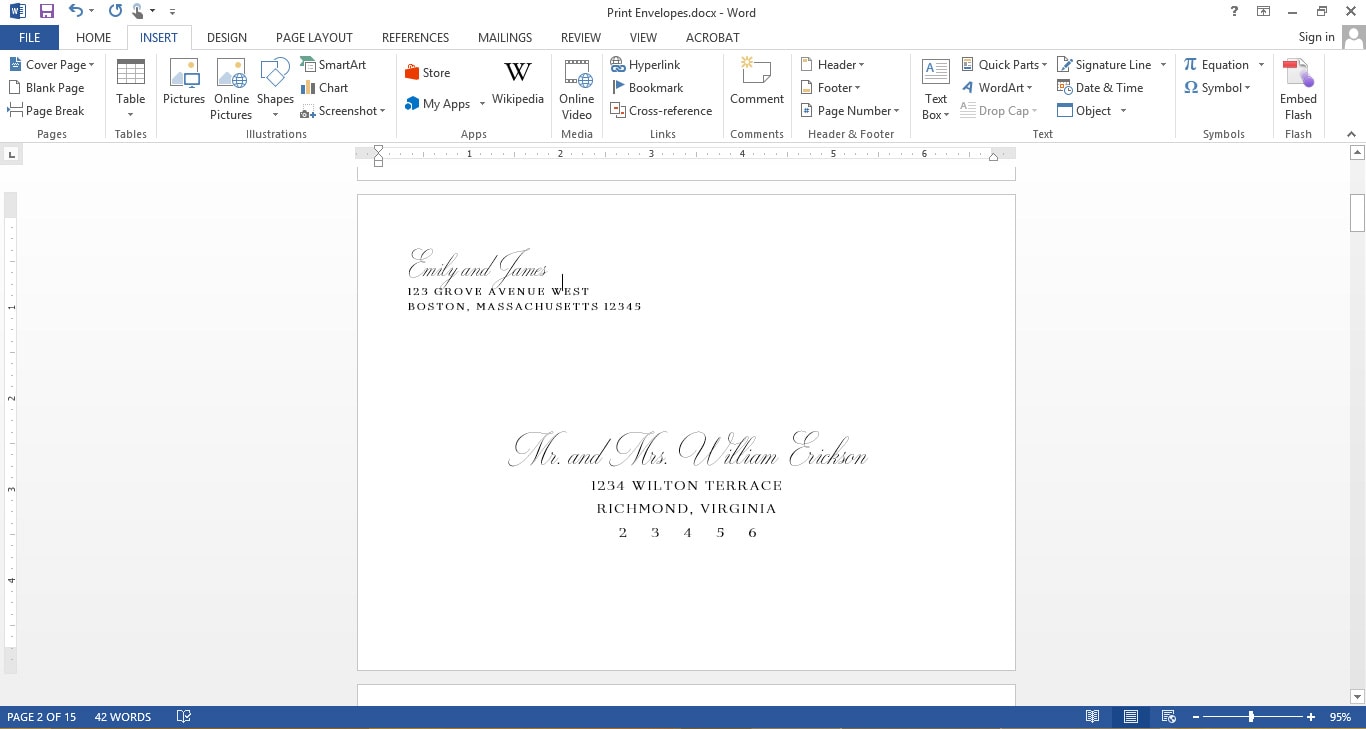
Scroll to page 2 and click in the upper left hand corner of the page.

Hit Ctrl + V.

Keep doing this until you’ve filled in all the pages of your envelope template.

Why hire a professional calligrapher when you can make your own printable envelope template and address your wedding invitations at home for free

Hit Save.

6. Fill in your addresses

If you’re not familiar with mail merge, the simplest thing to do is just copy and paste your addresses by hand. I know from experience that it only takes about 20 minutes to copy 100+ envelopes, which is about how long it would take you to troubleshoot mail merge.

Otherwise, you can search Google to find mail merge instructions based on your software version and operating system.

7. Print a sample

If you followed the instructions, this part should be easy.

Put a few envelopes in your printer’s paper tray. (If yours has one, I would use the rear feed tray as opposed to the bottom paper cassette. If you don’t have one, don’t panic.)

Make sure you enter the custom paper size in your print settings or, no matter what you do, it won’t print correctly. Then go back to the print preview and make sure the text is the right size, it’s centered and nothing is cut off.

Hit Print.

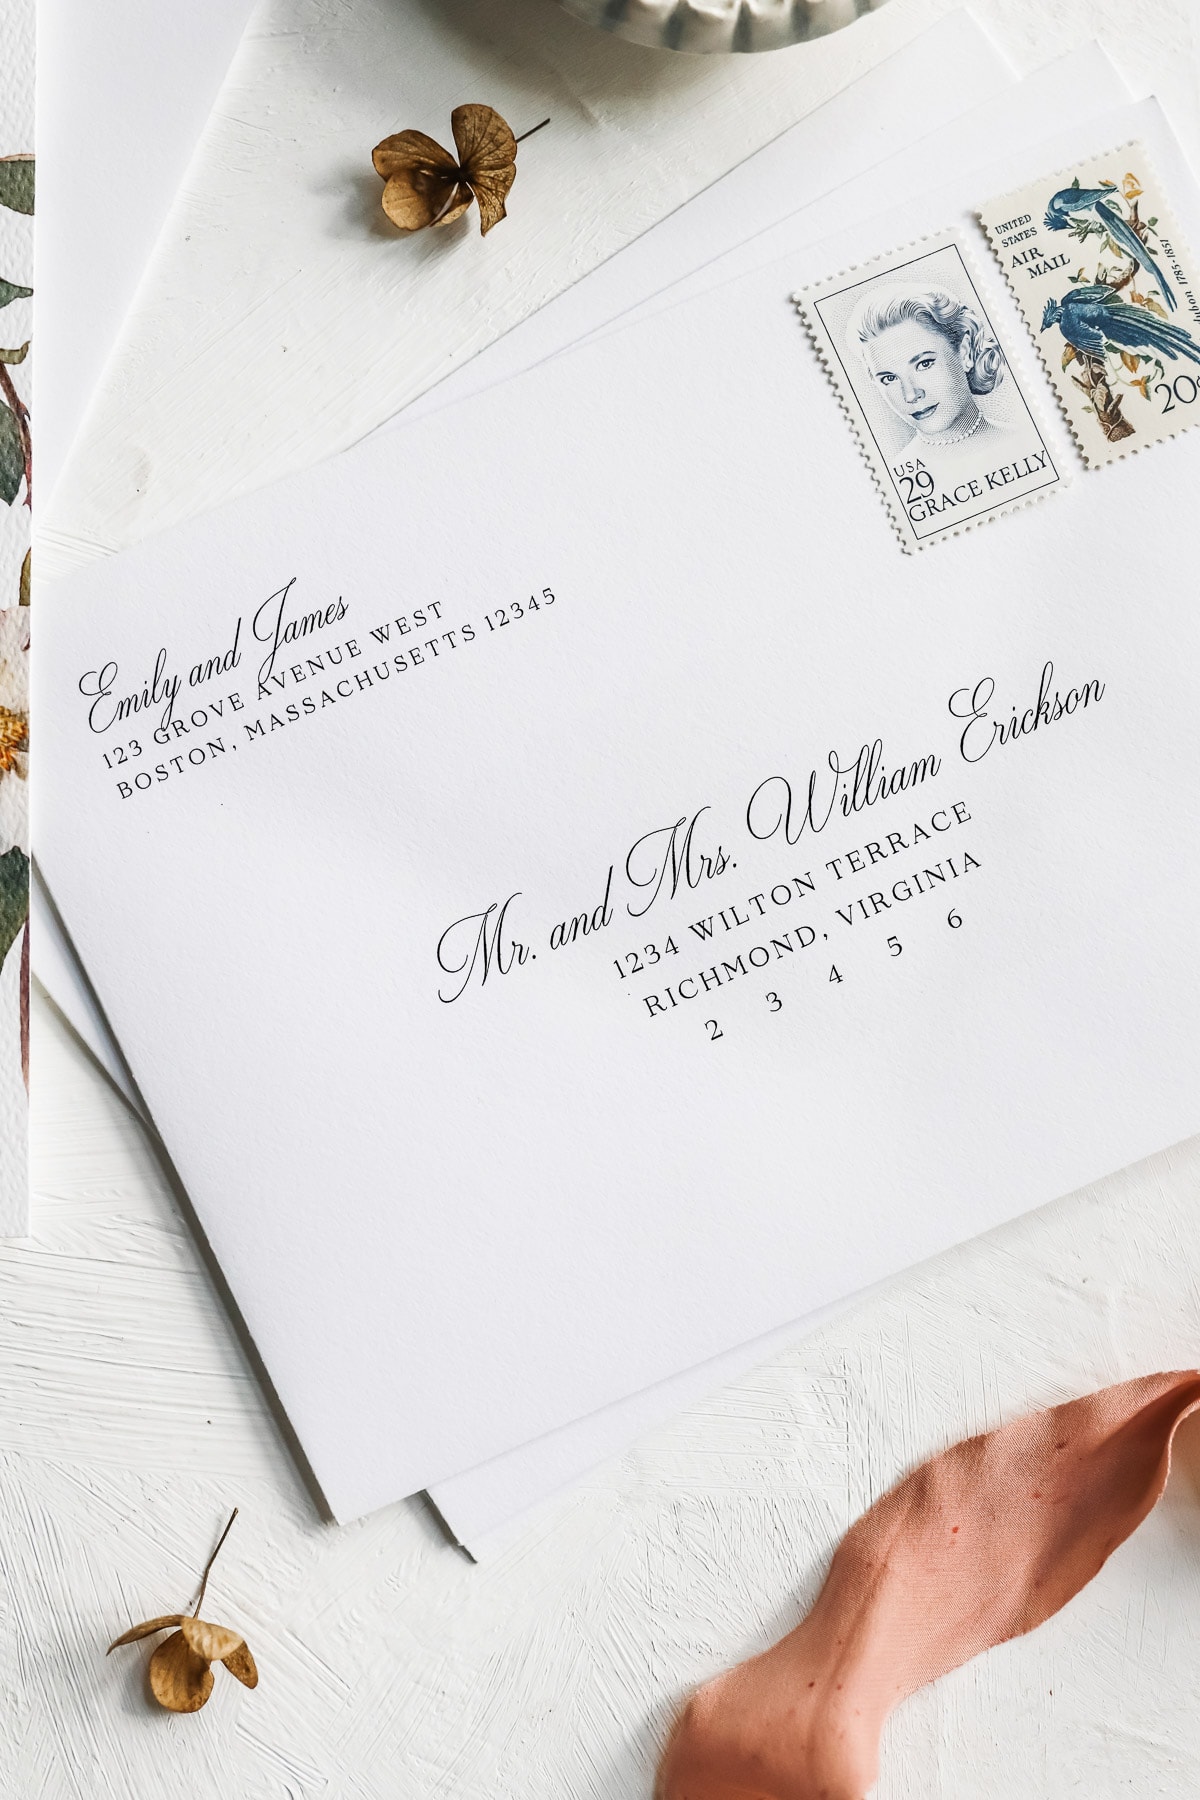
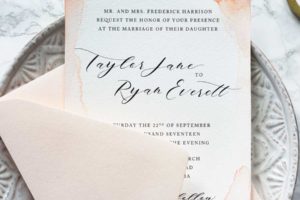
Here’s how my DIY envelope template looks straight out of the printer:

Why hire a professional calligrapher when you can make your own printable envelope template and address your wedding invitations at home for free

If everything looks good, go ahead and print the rest of your envelopes in small batches. 

Snag your free envelope template

If you want to snag our free A7 envelope template for use in Microsoft Word (the same one I used in this post!), just click here.

To make your template look like mine, you’ll need to install the font Milton Two.

–
Enjoy!

The information contained on this Website and the resources available for download through this website are for educational and informational purposes only. I am only sharing what worked for me and I cannot guarantee that any products or processes will give you the same results.

Tags: Paper
115
Share

You also might be interested in

Jamie + Matt | A Gorgeous Spring Wedding

Jamie + Matt | A Gorgeous Spring Wedding

Aug 31, 2017

When I received an email a couple months back from[...]

How to Make Wedding Invitations

How to Make Wedding Invitations

Dec 2, 2020

Fun fact: Pipkin Paper Co. got its start because of[...]

DIY Vellum Wedding Invitations

DIY Vellum Wedding Invitations

Aug 14, 2020

One of the best things about printing your own wedding invitations[...]

19 Comments

Leave your reply.
  • Lili
    · Reply

    April 25, 2018 at 1:15 PM

    Hi, thank you so much for this!!! Just wondering what the letterpress style font is that you used for the addresses? Found a great calligraphy font for the names, but all the fonts I found for the addresses look really amateurish. Thanks for your help!

    • Stephanie
      · Reply

      May 16, 2018 at 6:47 PM

      Hi Lili! The serif font is Adobe Caslon Pro, which can sometimes be found on free font sites.

      xo
      Stephanie

  • Winnie
    · Reply

    May 10, 2018 at 5:20 AM

    So, how did you do the return address on the flap?

    • Stephanie
      · Reply

      May 16, 2018 at 6:46 PM

      Hi Winnie. I just centered the text boxes, then flipped the envelopes over and ran them through the printer again.

      xo
      Stephanie

  • Vie
    · Reply

    May 21, 2018 at 7:50 PM

    Hi! Do you have a template for the return address?

    • Stephanie
      · Reply

      May 24, 2018 at 11:02 PM

      Hi Vie! Sadly, I don’t have one in the Resource Libary, but the envelope templates in the shop come with return addresses.

      xo
      Stephanie

  • Kirsten
    · Reply

    December 22, 2018 at 12:50 AM

    Hi! Have you ever thought about using the Mail Merge feature of Microsoft word? If you already have all your addresses i excel, it will automatically address the envelopes for you in the format you want. See the link below for an explanation of how i am currently doing it. Thanks for the template!

    https://support.office.com/en-us/article/create-envelopes-by-using-mail-merge-in-word-for-mac-dad64e13-3f4a-47b8-bb27-79d5b0031e0c#ID0EAACAAA=Office_2011

    • Stephanie
      · Reply

      January 30, 2019 at 4:04 PM

      This is awesome. Thank you, Kirsten!

  • Laura
    · Reply

    September 24, 2020 at 3:17 PM

    I was desperate to find an online envelope template this morning and came across your site. It was extremely helpful and thorough. Thank you!

  • Rachel
    · Reply

    September 30, 2020 at 1:55 AM

    Hello!

    I’m having some issues when trying to print my envelopes. it keeps cutting off the address, and i’m curious what i’m doing wrong?! I’m not able to chance my paper size in the print settings, i’m on a mac if that changes things?

    • Stephanie
      · Reply

      Author
      September 30, 2020 at 11:24 AM

      Hi Rachel. Since every printer’s settings are different, without more information I’m not sure what’s going on with your particular printer. You will most likely need to specify a custom paper size when printing your envelopes, and all (that I know of) allow you to do this, but where the option is located varies.

      A few things you can try:
      – Make sure you’re using the right size envelopes (A7)
      – See if your printer is adding margins, which might be cutting into your text
      – Google your printer make/model and see how to set a custom paper size

      • xz
        · Reply

        December 7, 2020 at 10:31 PM

        I had the same issue! I have a PC and Brother HL-L2390DW printer. I am able to set a custom size, however when I go print, the 8.5 x 11 is the default and the changes do not save. Any idea what the issue is?

        • Stephanie
          · Reply

          Author
          December 8, 2020 at 8:06 PM

          Hi there. Since each printer is different, I’m not sure what might be going on with your particular printer. It could be that you have a certain type of paper selected and your printer only allows 8.5″ x 11″ sheets for that paper. It could be that your printer drivers need to be updated. Or it could have something to do with any number of default settings specific to your printer. But Googling the problem along with your printer make and model might give you some answers.

          Best,
          Stephanie

  • Nora Klocke
    · Reply

    November 29, 2020 at 11:21 PM

    Will the postal office be able to read this zip code??

    • Stephanie
      · Reply

      Author
      December 2, 2020 at 8:55 PM

      Yep! 🙂

  • Logan
    · Reply

    December 28, 2020 at 10:01 PM

    I have tried everything to print these out on my envelopes and all my printer does is spit the envelope out with nothing on it, but it will print in on a regular sheet of paper. Any ideas what is happening?

    • Stephanie
      · Reply

      Author
      January 8, 2021 at 7:54 PM

      Hi Logan,

      Without knowing more about your specific printer model and computer operating system, I’m not really sure what might be going on. There are any number of print settings that can cause envelope issues and those settings tend to vary from printer to printer. Your best bet is to Google your printer’s make and model along with a description of the problem — chances are someone else with your printer has experienced the same issue.

      Steph

  • Caroline Cheatham
    · Reply

    November 11, 2021 at 3:43 AM

    Hi! I was wondering if you could share where you found the stamps on the envelopes in your picture! They’re beautiful!

    • Stephanie
      · Reply

      Author
      January 7, 2022 at 9:37 PM

      Hi Caroline. I actually made them myself for the photos. Sadly, they’re not real stamps.

      xo
      Steph

Leave a Reply

We don't like getting spam either. Your email is safe with us.
Cancel Reply

Hi there, I'm Stephanie and welcome to the Pipkin Paper Co. blog. Here's where our love of wedding stationery and DIYs meet. We'll show you how to plan the wedding of your dreams without breaking the bank.

Learn More About Us >>


Pipkin Paper Co.
About
Shop
Tools We Love
Disclaimer
Privacy Policy
Cookie Policy

Support
Troubleshooting
FAQs
Contact Us

© 2025 · Steph Pollard Studio, LLC

  • Privacy Policy
  • FAQ
  • Troubleshooting
  • Contact Us
Prev Next
This website uses cookies to improve your experience. We'll assume you're ok with this, but you can opt-out if you wish. Cookie settingsACCEPT
Privacy & Cookies Policy

Privacy Overview

This website uses cookies to improve your experience while you navigate through the website. Out of these cookies, the cookies that are categorized as necessary are stored on your browser as they are essential for the working of basic functionalities of the website. We also use third-party cookies that help us analyze and understand how you use this website. These cookies will be stored in your browser only with your consent. You also have the option to opt-out of these cookies. But opting out of some of these cookies may have an effect on your browsing experience.
Necessary
Always Enabled
Necessary cookies are absolutely essential for the website to function properly. This category only includes cookies that ensures basic functionalities and security features of the website. These cookies do not store any personal information.
Non-necessary
Any cookies that may not be particularly necessary for the website to function and is used specifically to collect user personal data via analytics, ads, other embedded contents are termed as non-necessary cookies. It is mandatory to procure user consent prior to running these cookies on your website.
SAVE & ACCEPT