

How to Make a Template in Word (Passive Income 101 Part 2)
Pssst. This post was originally published on my old blog, back when I was designing resumes on the side. Since I’m now designing and selling digital downloads full time here at Pipkin Paper Company, I thought this post would be a better fit here. This is still how I make a template in Word to this day.
And in case you missed it, Part I: How to Make Passive Income.
Microsoft Word is, in my opinion, the simplest and most straight forward way to start making money with templates. Now, is it every designers dream to be designing in Word? No. But you’re designing for the end user, not other designers. That means less time spent teaching your customers how to use Illustrator and more time spent designing and selling products.
And more time designing products = more money in your pocket.
While I’m going to be showing you how to make a resume template in Word in this post, you can use this guide as a jumping off point for making whatever templates you want. I’ve used Word to design wedding invitations, business cards, planner pages, you name it.
The process is the same no matter what product you’re making, so don’t let the resume part fool you.
How to Make a Template in Word
1. Gather inspiration
Before getting started, I like to head to Etsy and get an idea for what sort of templates are already out there. Not only will this give you inspiration, but more importantly, it will show you where there’s an untapped market.
In order to be successful on Etsy you have to be different. If you want to make serious money, your designs shouldn’t look and feel like anyone else’s. If they do, your customers will flock to the other, more established seller who’s already got hundreds of sales and rave reviews.
As a newbie, you need a product shoppers can’t find anywhere else.
Do a quick Pinterest search for the phrase “resume design” and see what comes up. Get a feel for what’s already been done and start planning ways you can do it differently. If you see lots of boring, standard resume templates, make yours colorful and exciting. Cater to creatives instead of corporate job hunters. Play around with different fonts, graphics, and layouts.
Basically, create a niche for yourself that hasn’t been tapped before.–
2. Make Your Template
Now that you have an idea for what’s been done and what you’re going to do differently, let’s create our template.
Start with your header
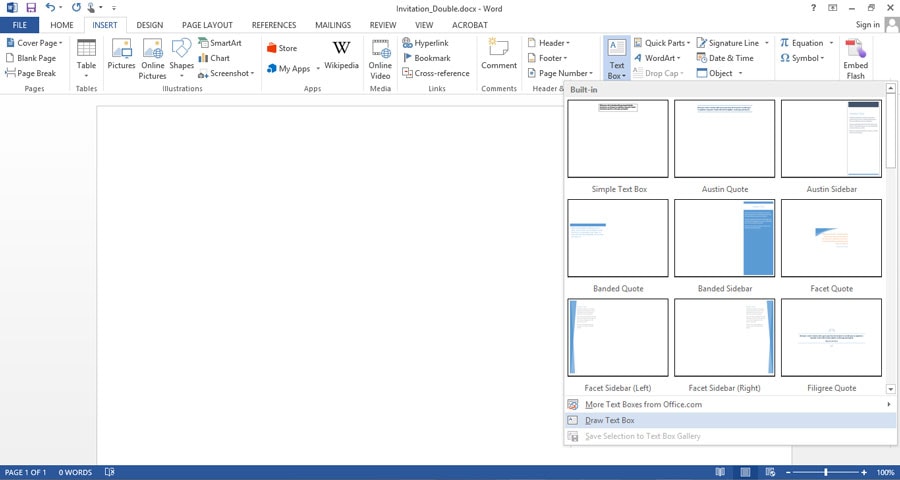
Open a blank Word document. On the ribbon at the top, you’ll see a bunch of options for editing your document. Click the tab that says INSERT. Select the button that says “Text Box” and click the option at the bottom of the list that says “Draw Text Box”.
Click and drag your mouse across the page to create an empty text box. Since this is a resume, I’m going to make up a name to put in my header, and simply click inside the text box and start typing. Next we’re going to format it by highlighting our text, clicking the HOME tab and selecting a font from the drop down. If you want, you can also change the font color and text alignment here as well.
Change the fill color
If you’d like more than just a blank text box (we want to be exciting, remember?), add a fill color by clicking the tab that says DRAWING TOOLS/FORMAT and the button that says “Shape Fill”. Pick a color from the list or click “More Fill Colors” to define your own.
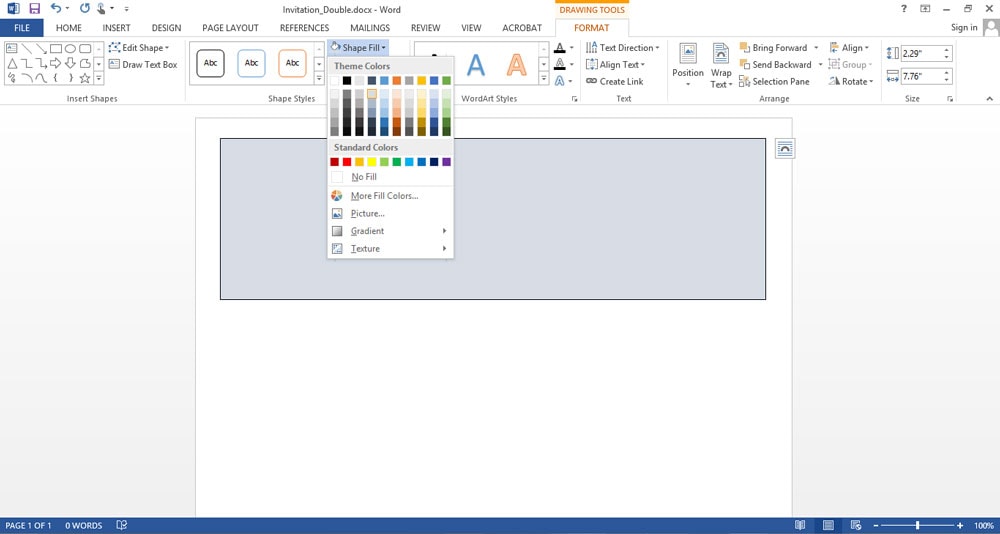
To get rid of the colored outline, click the button that says “Shape Outline” (just below “Shape Fill”) and pick the option that says “No Outline”
Give your text some breathing room
Type a name inside the text box, then center it.
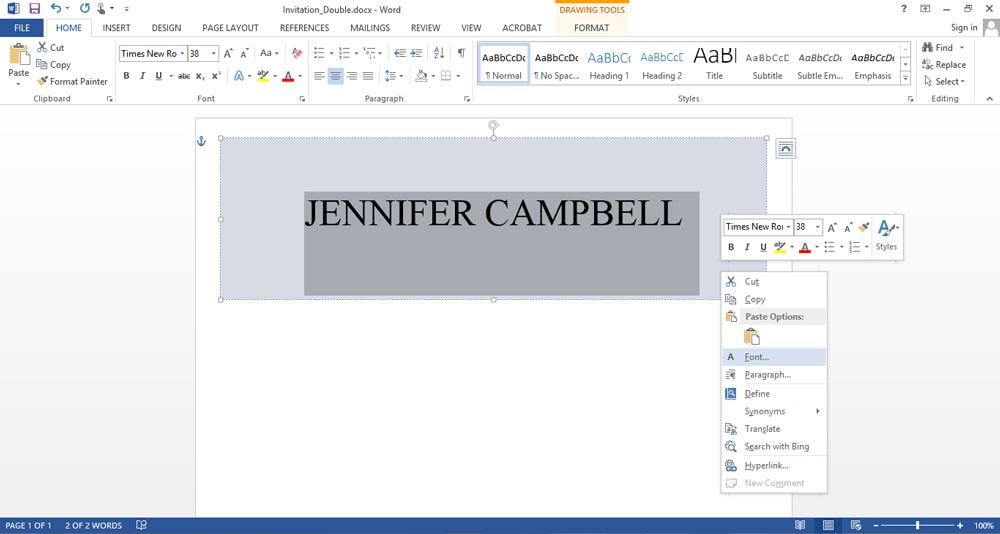
One of the easiest ways to add some interest and make your template look more professional is by spacing out the letters in the header. To do this, simply highlight the contents of your text box and right click. Select the button that says “Font…” and within the Font box, click the tab that says “Advanced”.
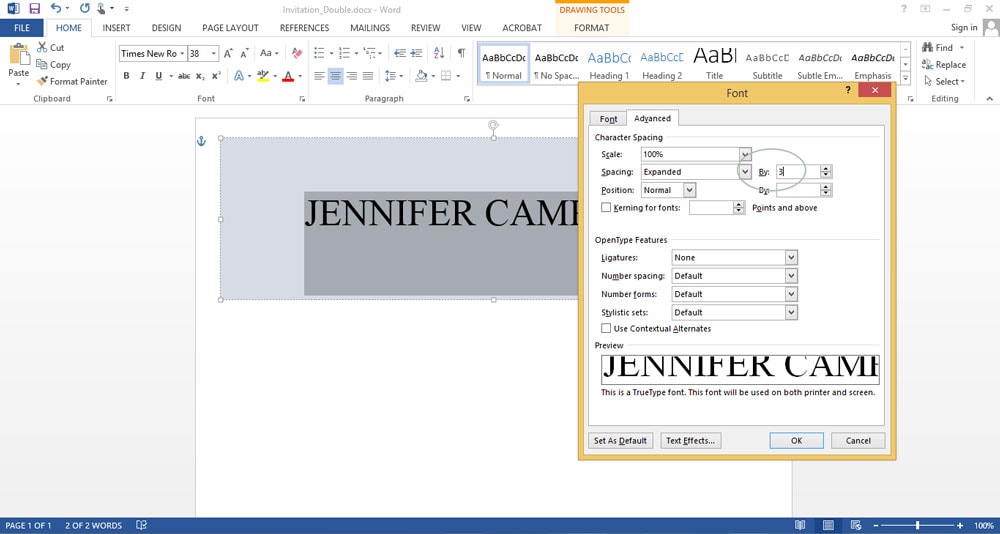
Next, click inside the field next to “Spacing” that says “By”. Type a ‘3’ and hit OK. Now your header has breathing room and looks a little more polished.
Create your columns
Click INSERT and this time select “Shapes”. Select the rectangle shape and use your mouse to click and drag until you get the desired size.
Then highlight the shape and go to FORMAT, “Shape Fill” and “Line Fill” to change the colors.
Note: I use “Shapes” and “Text” boxes interchangeably. If I’m adding a section heading and will only have one or two words inside the box, I’ll usually choose to add a text box. But if I’m adding a column that will have multiple sections within the same box, I’ll add a shape and then place my text boxes within the shape.
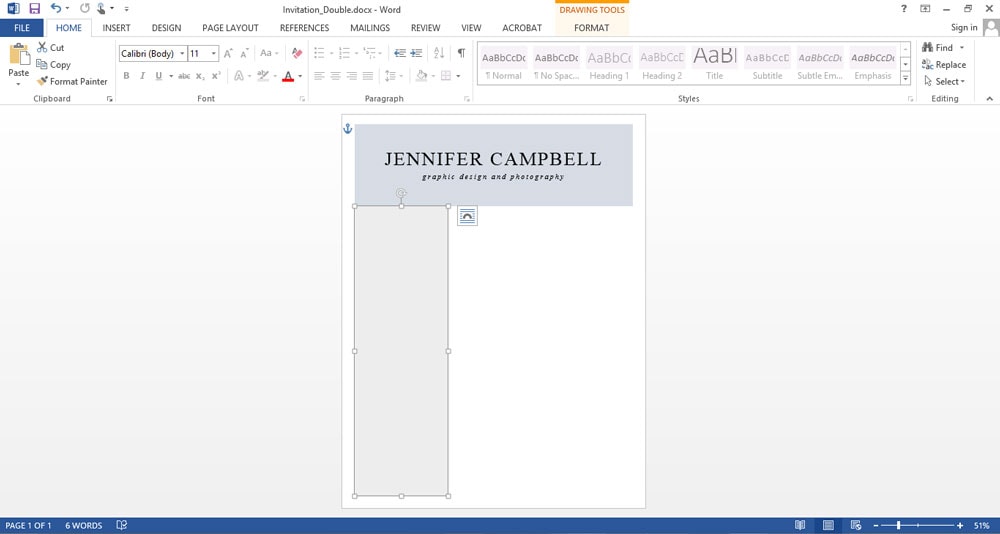
Fill in the remaining sections
Click INSERT, “Text Box” and “Draw Text Box”. Click and drag to create the desired size. Then go to FORMAT, “Shape Fill”, and click “No fill” to make it see-through. Do the same for “Shape Outline” to get rid of the outline. Then start typing.
Do this for all your template sections.

If you have a lot of sections, it doesn’t always make sense to make up a ton of filler text, so I like to use Lorem Ipsum text. Simply tell the generator how much text to create, then copy and paste it into your text boxes. Format the text by adding spaces, bullets, and indents where necessary to make the text look as realistic as possible.
Keep adding section titles and text boxes as needed until you’ve covered the page.
Once you’ve finished, save your file in a new folder. This will be what your customer downloads when they buy one of your templates.
Create additional documents
In addition to your main template, there are also a couple documents you might want to include to make the process easier for your customers:
- Instructions. A lot of your customers won’t be as computer savvy as you are. That’s why they’re buying your templates! Try making things easier by anticipating their questions and including the answers in a separate FAQ document. Once your shop goes live you’ll also start to accrue a long list of frequently asked questions you never thought about – add these to your instructional document as you receive them. From my experience, FAQs typically include things like how to change the spacing between the letters, how to re-size text boxes, how to change colors, and will this template work with Apple Pages/Google Docs/misc other software.
- Font guide. A lot of shops (mine included) use free, non-standard fonts that don’t come pre-loaded on most computers. They can be downloaded from various websites such as Font Squirrel or DaFont, but your customers will need to know where to find them, how to download them, and how to install them in order to make their template look like the example. If you choose to use nonstandard fonts, be sure to include a Font Guide telling your customers where to get them and how to install them.
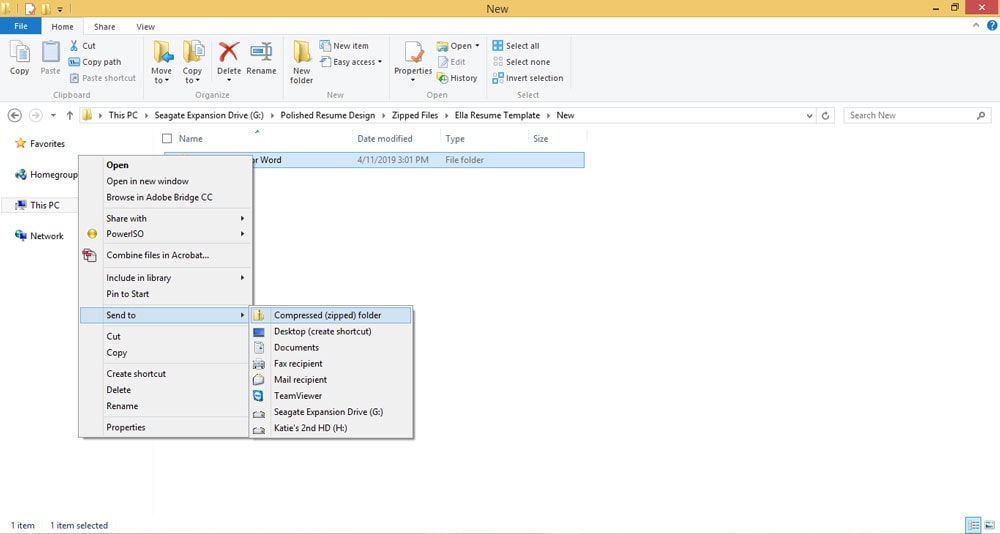
3. Zip your file
Finally, zip your templates, instructional documents, and font guide into a single file folder to be uploaded. While this isn’t always necessary, if you have a lot of files to upload, it helps keep everything in one place and cuts down on download time dramatically.
To do this, highlight all your files and right click. Click “Send To” and then “Compressed (zipped) Folder”. Give your folder a simple, descriptive name, and you’re done!
Now that you’ve got your first template, I’m sure you’re chomping at the bit to list it on Etsy, right? Patience, grasshopper. It’s hard, I know, but there’s still a couple more things we need to do before we’re ready to throw open the doors to our shop and start earning money.
In Part 3 we’re going to cover how to create pretty, professional looking images for your listings that set your shop apart and scream “click me!”.
Until then, keep creating templates. Since Etsy shows 4 listings per row, I like to have at least 4 templates (ideally, 16 – 20) before opening a shop. That way new customers won’t get scared off by an empty, haphazard looking store front with only a single template to choose from.
Next up in our Passive Income 101 series: Part 3 – Creating Product Images That Sell.
The information contained on this Website and the resources available for download through this website are for educational and informational purposes only. I am only sharing what worked for me, and as such, I cannot guarantee that any products or processes will give you the same results.

Leave a Reply
We don't like getting spam either. Your email is safe with us.