

DIY Gold Foil Wedding Invitations
One thing I’ve never understood is why beautiful, personalized wedding invitations have to be so expensive. Consider me old school (or even a bit naïve), but it’s just paper, right?
(Just kidding, I know they’re not “just paper” but that still doesn’t mean they have to cost so much!)
As a designer I know that a lot of blood, sweat and tears go into designing wedding stationery, and sometimes that’s where the primo price tag comes from. But just because you’re on a budget doesn’t mean you can’t have the gorgeous invitations of your dreams (that’s our motto here at Pipkin Paper Company so you’ll be hearing it a lot from us!).
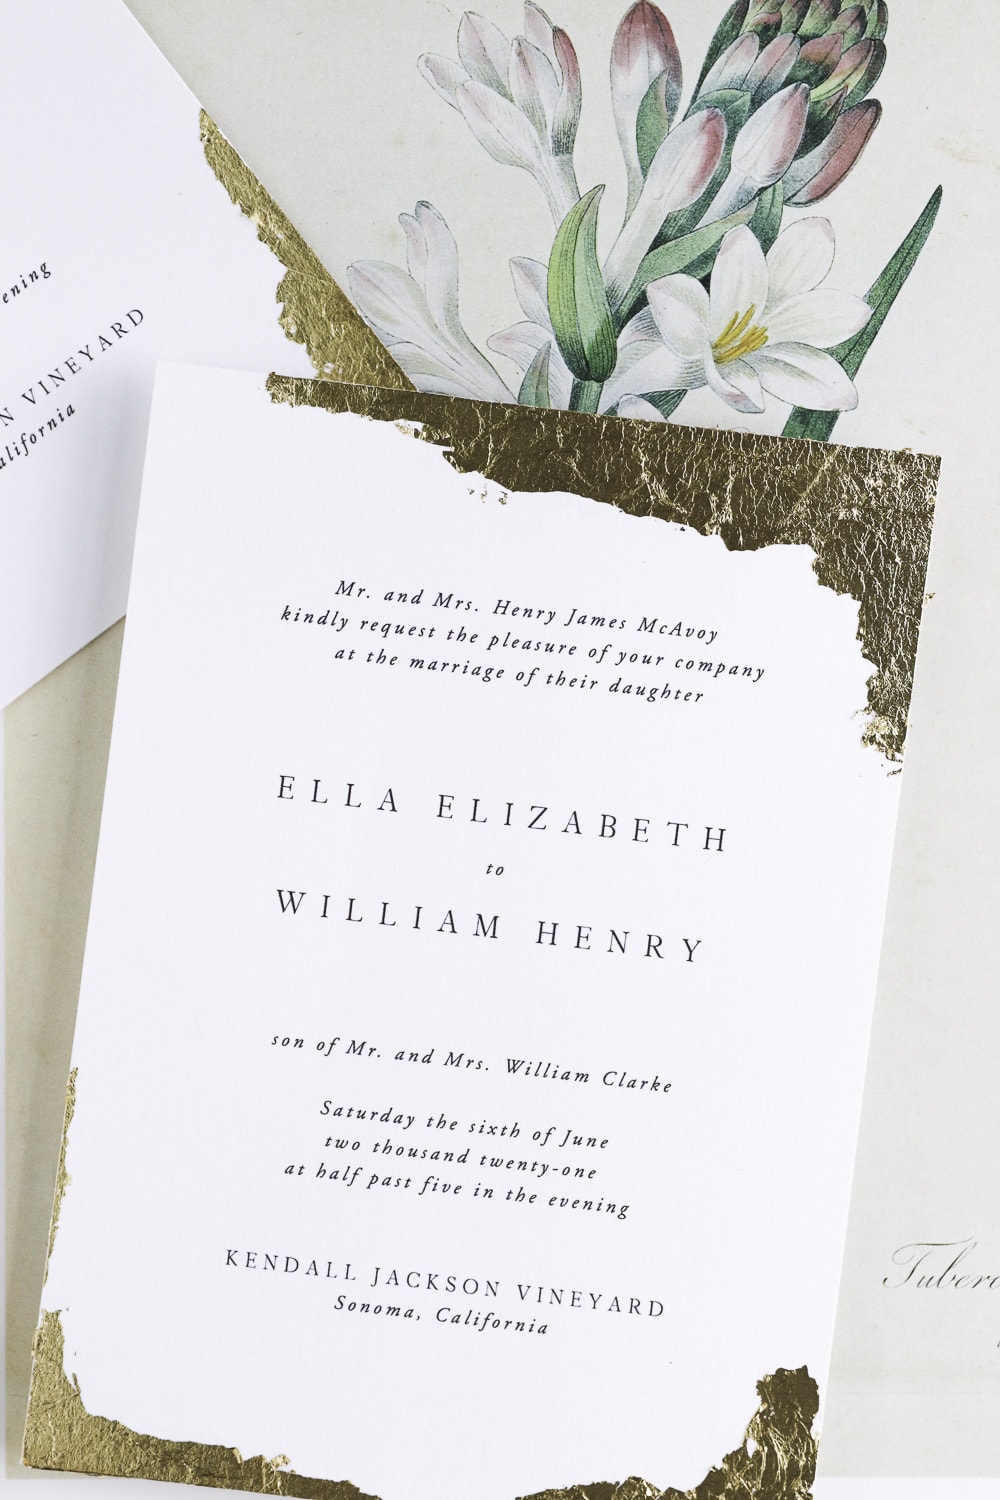
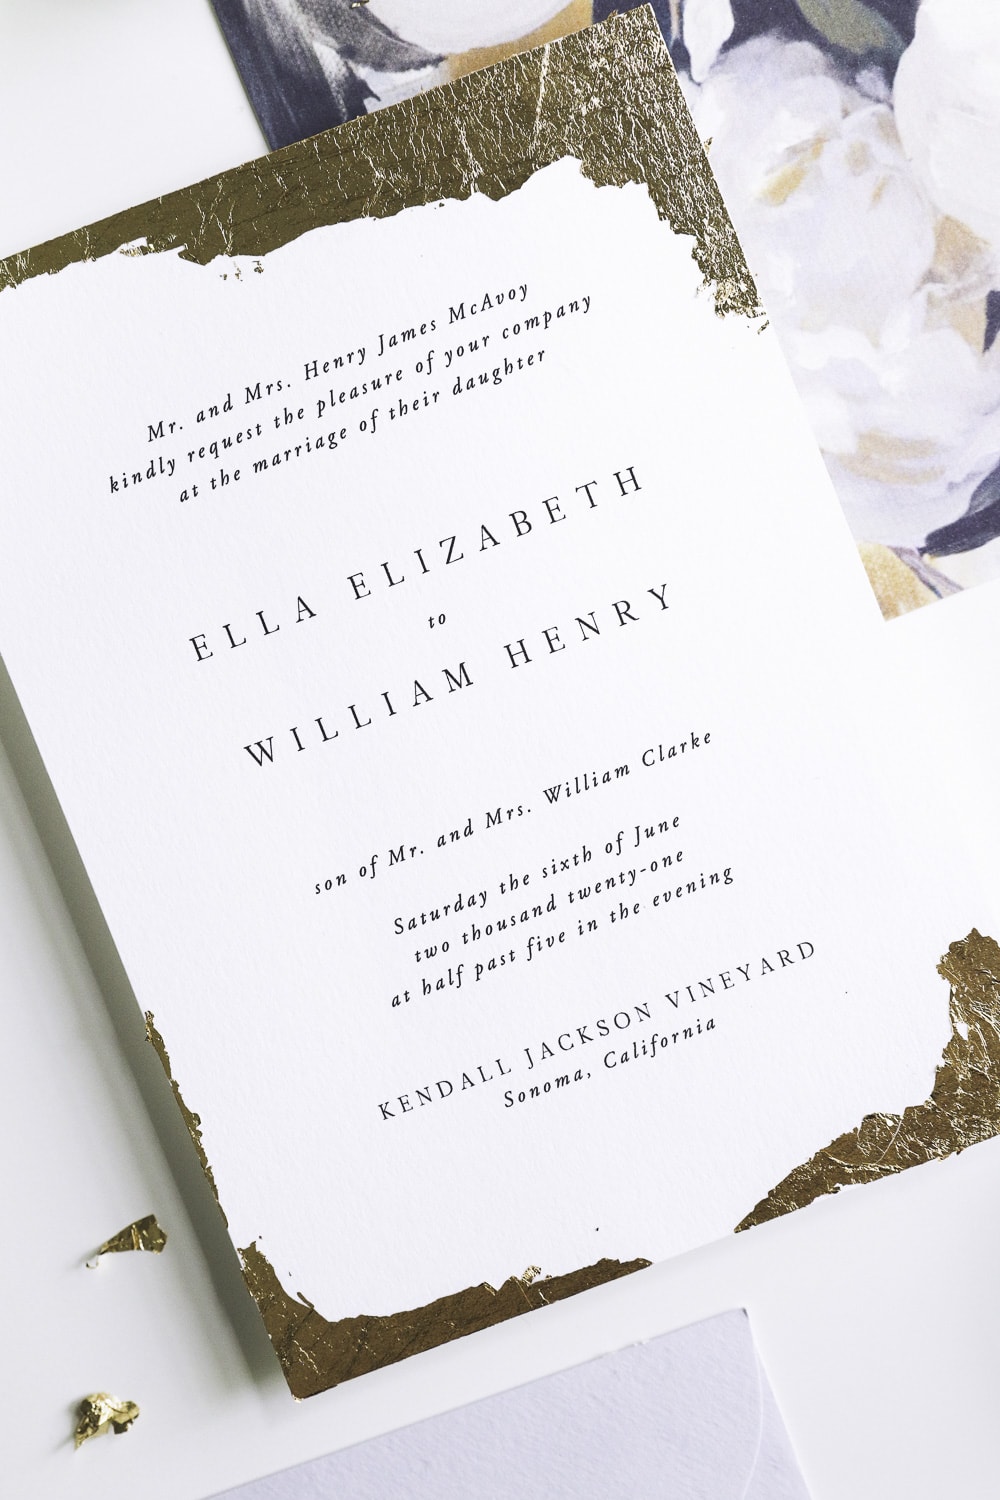
With just a little bit of glue and a few sheets of gold foil you can doll up your printed wedding invites and make them look like a million bucks – all while secretly laughing when your guests gush over how pretty and professional they look.
Now I know what you’re thinking — you’ve got 150 invitations to mail out and you can’t possibly glue gold foil on each of them — but that’s actually the beauty of this little DIY. Gold foil looks best when it’s a little chipped and rustic with torn edges and a hint of paper peeking through. You don’t need to spend much time for them to look incredible and in fact, the less perfect they are, the better.
It’s a DIY dream.
So round up your bridesmaids to make things go a little quicker and trust me when I say you can do this and it will look awesome.
Read on to learn how to make these glinty, gold foil invitations yourself.
DIY Gold Foil Wedding Invitations
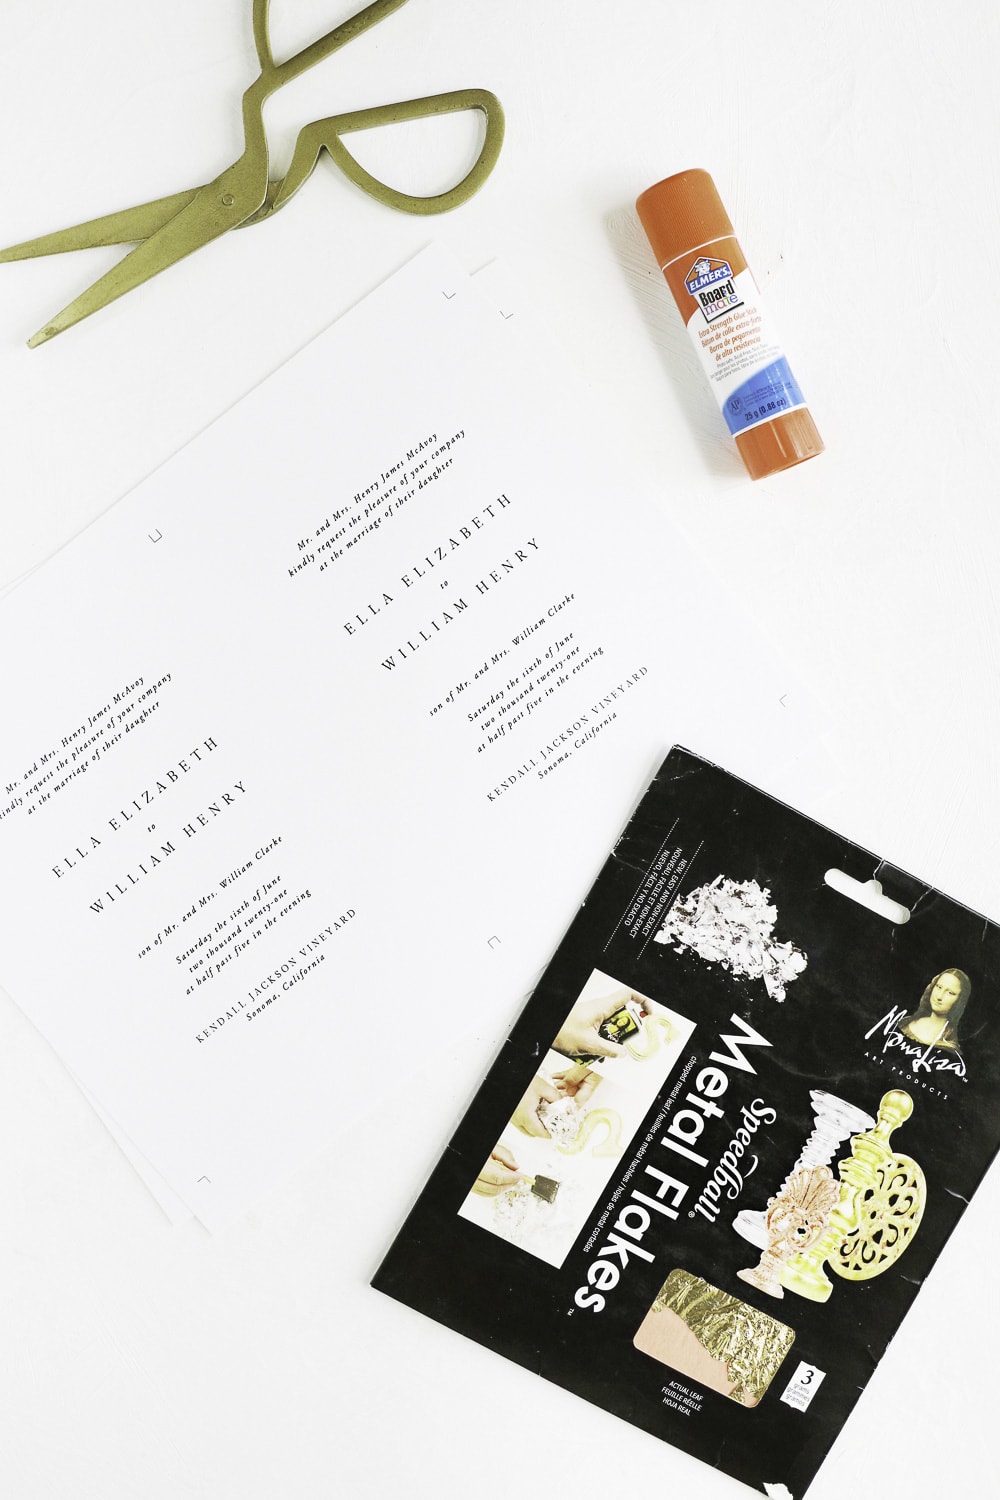
Materials
Heavy duty cardstock
Extra strength glue stick
Gold leaf
Instructions
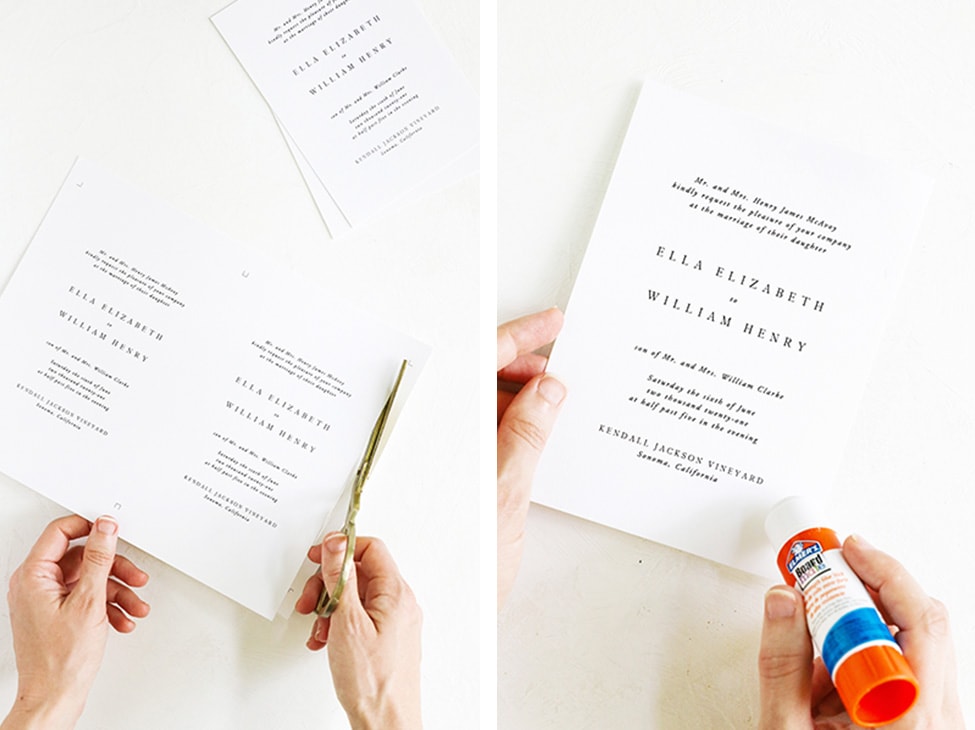
1. Start by printing your wedding invitations on a heavy duty card stock, either at home or using a professional printer. Make sure to print a few extras so you can test out your technique beforehand. Trim them out.
2. Apply a light coat of glue to the bottom edge of the invitation. Try to think about where you’re going to be placing the gold foil ahead of time and only apply glue where you need to. This will prevent a lot of excess glue from showing around the gold foil.
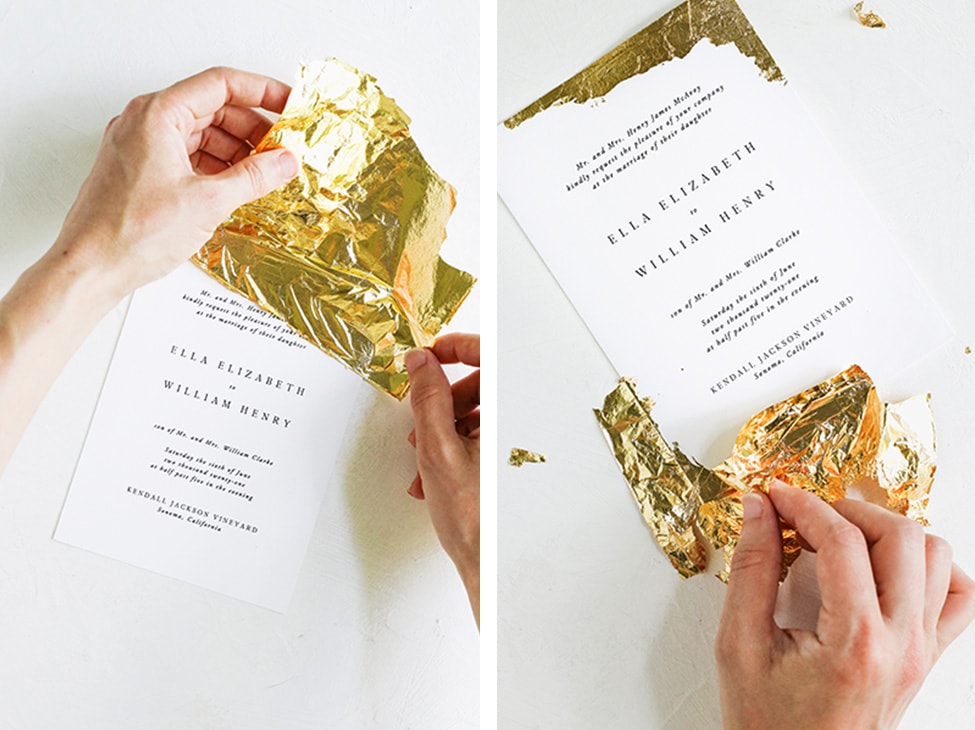
3. With clean hands, tear off a small sheet of gold foil. Gently lay the piece of foil on top of the glue and use your fingers to carefully smooth out the foil and remove any air bubbles.
Use your fingers to remove any excess foil not held on by glue.
4. Repeat the process with the other corners. I only did the upper right and lower left corners but you can do any corners you like.
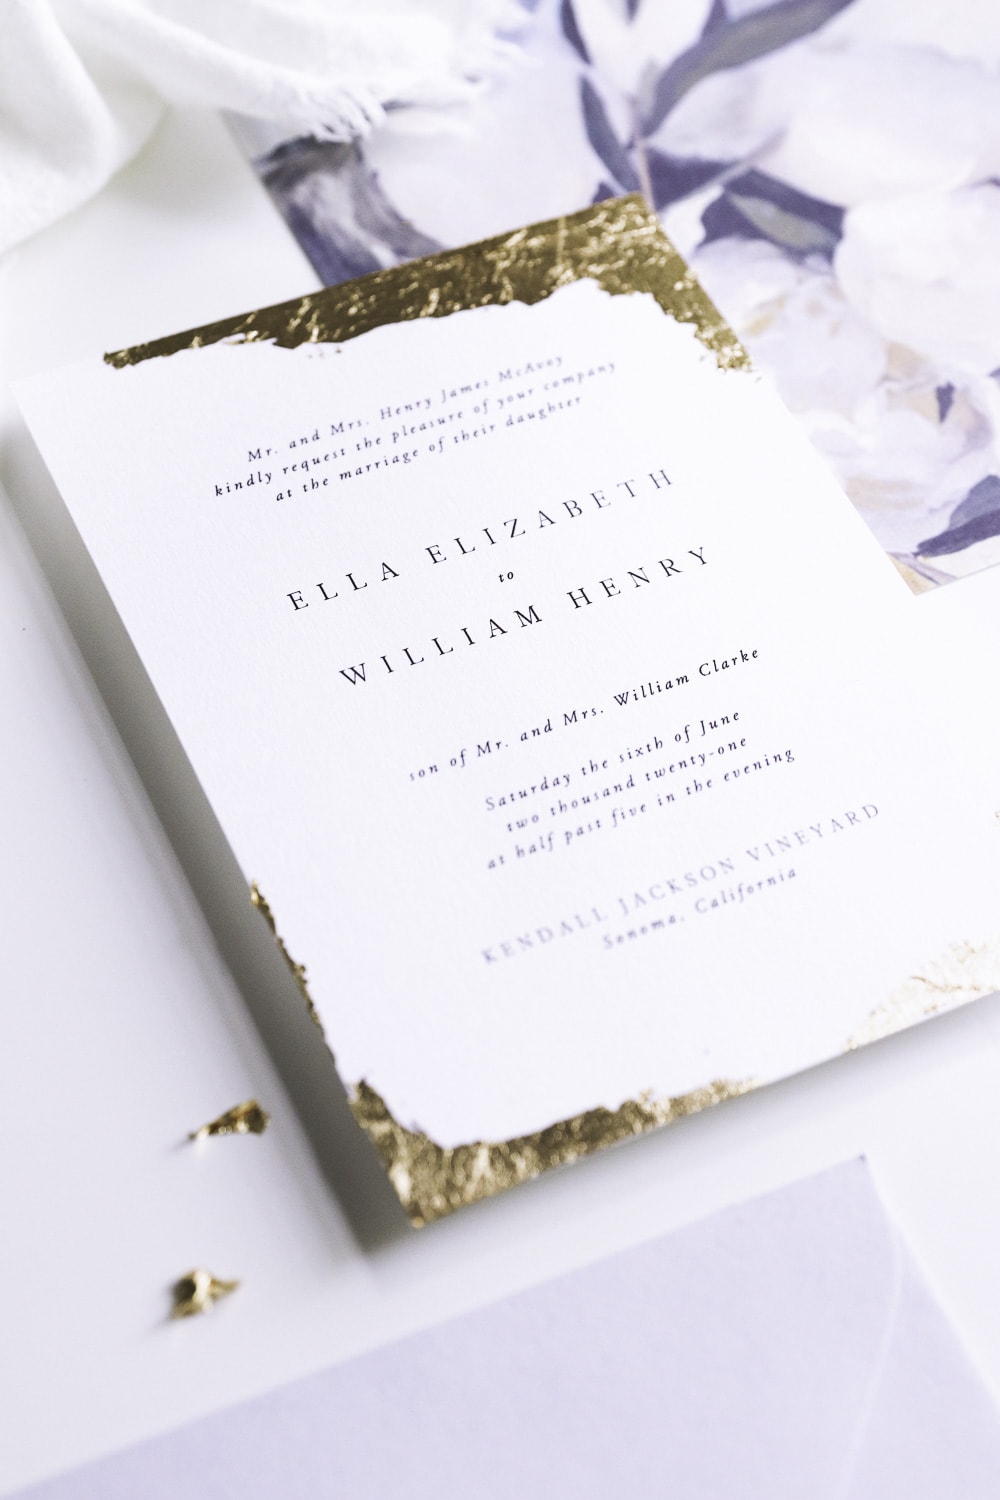
That’s it! Once the glue has completely dried, your gold foil wedding invitations should be ready to pop in the mail and send to your friends and family.
The information contained on this Website and the resources available for download through this website are for educational and informational purposes only. I am only sharing what worked for me, and as such, I cannot guarantee that any products or processes will give you the same results.

Leave a Reply
We don't like getting spam either. Your email is safe with us.